概述
本实验来自于https://learn-to-code.workshop.aws/
实验中,也涉及有关如何在程序中使用translate服务。
本文主要讨论Python中不同的Input方式
实验环境
依然使用Cloud 9,具体方法请参考:https://blog.csdn.net/weixin_43394724/article/details/120882845
实验步骤
CLI方式
前面我们通过**kwargs来做字符串的输入,原始代码如下:
import boto3

def translate_text(**kwargs):
    client = boto3.client('translate')
    response = client.translate_text(**kwargs)
    print(response)

### Change below this line only ###

kwargs={
    "Text":"I am learning to code in AWS",
    "SourceLanguageCode":"en",
    "TargetLanguageCode":"zh"
    }

def main():
    translate_text(**kwargs)

if __name__=="__main__":
    main()
input()函数
利用input()函数,我们可以实现从命令行输入代码所需的内容,将上一节代码改变为:
import boto3

def translate_text(**kwargs):
    client = boto3.client('translate')
    response = client.translate_text(**kwargs)
    print(response)

### Change below this line only ###

text = input("Provide the text you want translating: ")
source_language_code = input("Provide the two letter source language code: ")
target_language_code = input("Provide the two letter target language code: ")

def main():
    translate_text(
        Text=text,
        SourceLanguageCode=source_language_code,
        TargetLanguageCode=target_language_code
        )

if __name__=="__main__":
    main()
运行结果:
Provide the text you want translating:
学习雷锋好榜样Provide the two letter source language code:zhProvide the two letter target language code:en{‘TranslatedText’:"Learn from Lei Feng's good example", ‘SourceLanguageCode’:'zh', ‘TargetLanguageCode’:'en', ‘ResponseMetadata’: {‘RequestId’: ‘ffa73286-4d9c-4daa-9105-6aa0521254da’, ‘HTTPStatusCode’: 200, ‘HTTPHeaders’: {‘x-amzn-requestid’: ‘ffa73286-4d9c-4daa-9105-6aa0521254da’, ‘cache-control’: ’no-cache’, ‘content-type’: ‘application/x-amz-json-1.1’, ‘content-length’: ‘107’, ‘date’: ‘Mon, 01 Nov 2021 03:19:40 GMT’}, ‘RetryAttempts’: 0}} Process exited with code: 0
很显然,这种方式对于人机交互方式,在命令提示下提供输入时非常有用;但是,它对于由程序、方法、API或脚本提供的输入就显得不太有用。
CLI ARGUMENTS
Python有一个名为argparse的内置参数解析器。它可以非常容易的编写用户友好的命令行界面。 更为详细的参考:https://docs.python.org/zh-cn/3/howto/argparse.html
将代码进行改造:
import argparse # argparse is a built in python package, we add it with an import statement
import boto3

# Define the parser variable to equal argparse.ArgumentParser()
parser = argparse.ArgumentParser(description="Provides translation between one source language and another of the same set of languages.")

# Add each of the arguments using the parser.add_argument() method
parser.add_argument(
    '--text',
    dest="Text",
    type=str,
    help="The text to translate. The text string can be a maximum of 5,000 bytes long. Depending on your character set, this may be fewer than 5,000 characters",
    required=True
    )

parser.add_argument(
    '--source-language-code',
    dest="SourceLanguageCode",
    type=str,
    help="The language code for the language of the source text. The language must be a language supported by Amazon Translate.",
    required=True
    )

parser.add_argument(
    '--target-language-code',
    dest="TargetLanguageCode",
    type=str,
    help="The language code requested for the language of the target text. The language must be a language support by Amazon Translate.",
    required=True
    )

# This will inspect the command line, convert each argument to the appropriate type and then invoke the appropriate action.
args = parser.parse_args()

def translate_text(**kwargs):
    client = boto3.client('translate')
    response = client.translate_text(**kwargs)
    print(response)

def main():
    # vars() is an inbuilt function which returns a dictionary object
    translate_text(**vars(args))

if __name__=="__main__":
    main()
- 我们使用import argparse导入了一个名为argparse的python包
- 我们创建了一个ArgumentParser对象,它保存将命令行解析为python数据类型所需的信息
- 我们使用parser.add_argument()来添加每个参数。这有以下语法
参数名称,例如–text dest必须使其成为参数接受的value关键字参数,否则它将使用默认参数text=“value” type是数据类型,在本例中是字符串(str) help是显示的帮助文本
- args=parser.parse_args()将检查命令行,将每个参数转换为适当的类型,然后调用适当的操作
- 现在,当我们调用translate_text()函数时,我们需要使用**vars(args)。**vars将args=parser.parse_args()创建的对象转换为字典对象,我们可以将其作为key:value对传递给函数
使用–help运行代码可以看到:
zyi:~/environment/python-01 $ python lab_5_step_2_cli_arguments.py --help
usage: lab_5_step_2_cli_arguments.py [-h] --text TEXT --source-language-code
                                     SOURCELANGUAGECODE --target-language-code
                                     TARGETLANGUAGECODE

Provides translation between one source language and another of the same set
of languages.

optional arguments:
  -h, --help            show this help message and exit
  --text TEXT           The text to translate. The text string can be a
                        maximum of 5,000 bytes long. Depending on your
                        character set, this may be fewer than 5,000 characters
  --source-language-code SOURCELANGUAGECODE
                        The language code for the language of the source text.
                        The language must be a language supported by Amazon
                        Translate.
  --target-language-code TARGETLANGUAGECODE
                        The language code requested for the language of the
                        target text. The language must be a language support
                        by Amazon Translate.
按照我们设计列出了参数和帮助信息。
完整的执行代码:
zyi:~/environment/python-01 $ python lab_5_step_2_cli_arguments.py –text “we are learning python on AWS” –source-language-code en –target-language-code zh {‘TranslatedText’:
'我们正在 AWS 上学习 python', ‘SourceLanguageCode’:'en', ‘TargetLanguageCode’:'zh', ‘ResponseMetadata’: {‘RequestId’: ‘76dea3c1-b0bb-4401-9a22-026c5d61a0d0’, ‘HTTPStatusCode’: 200, ‘HTTPHeaders’: {‘x-amzn-requestid’: ‘76dea3c1-b0bb-4401-9a22-026c5d61a0d0’, ‘cache-control’: ’no-cache’, ‘content-type’: ‘application/x-amz-json-1.1’, ‘content-length’: ‘106’, ‘date’: ‘Mon, 01 Nov 2021 03:56:23 GMT’}, ‘RetryAttempts’: 0}}
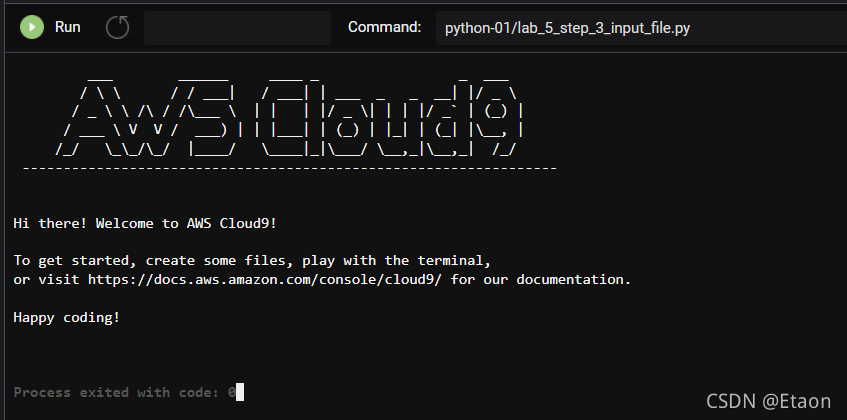
从文件input
open函数是一个内置函数。 文档可以传入一个可选模式。在下面的例子中,我们传入r。这表示该文件以只读方式打开。要写入文件,则使用w。 文件使用cloud9的readme.md
def open_input(file):
    with open(file, 'r') as f:
        text = f.read() #We use read() to read the actual contents of the file
        print(text)

def main():
    open_input("README.md")

if __name__=="__main__":
    main()
- Python使用README.md作为文件的输入参数。
- 与open()一起使用以只读方式打开文件和r。
- 使用.read()方法读取文件内容并将其分配给变量text。
- 打印变量以返回句子。
运行结果:
Json
JSON代表Javascript对象表示法,发音为“jason”。它的结构与python字典和列表非常相似,只有少数例外。在使用应用程序编程接口(API)时,计算机程序交换信息是一种非常常见的格式。
对比Json和Python的参数定义,还有一些不同:
| Python | JSON |
|---|---|
| dict | object |
| list,tuple | array |
| str | string |
| int, float | number |
| True | true |
| False | false |
| None | null |
这两个方法使用JSON字符串。在学习操作JSON时,很容易混淆: JSON.loads() JSON.dumps()和JSON.load() JSON.dump()
json.load()& json.dump() -用于从文件到文件中输入和输出json。 json.loads()& json.dumps()-用于输入和输出字符串中的json和字符串中的json。
创建一个json文件并使用json.loads()输入和json.dumps()输出:
import json

# This uses a json string as an input

json_string = """
{
    "Input":[
        {
        "Text":"I am learning to code in AWS",
        "SourceLanguageCode":"en",
        "TargetLanguageCode":"zh",
        "Required": true
        }
    ]
}
"""

def main():
    json_input = json.loads(json_string)
    indented_format = json.dumps(json_input, indent=2)
    print(json_input)
    print("\n")
    print(indented_format)

if __name__=="__main__":
    main()
运行结果:
{‘Input’: [{‘Text’: ‘I am learning to code in AWS’, ‘SourceLanguageCode’: ’en’, ‘TargetLanguageCode’: ‘zh’, ‘Required’:
True}]}
{ “Input”: [ { “Text”: “I am learning to code in AWS”, “SourceLanguageCode”: “en”, “TargetLanguageCode”: “zh”, “Required”:
true} ] }
标红部分显示着两者的差别。
上面的例子我们可以看到Json文件到Python以后是一个字典结构,如果要给不同参数赋值,采用切片方法:
import json

# This uses a json string as an input

json_string = """
{
    "Input":[
        {
        "Text":"I am learning to code in AWS",
        "SourceLanguageCode":"en",
        "TargetLanguageCode":"zh",
        "Required": true
        }
    ]
}
"""
# Modify below this line
def main():
    json_input = json.loads(json_string)
    text = json_input['Input'][0]['Text']
    source_language_code = json_input['Input'][0]['SourceLanguageCode']
    target_language_code = json_input['Input'][0]['TargetLanguageCode']
    print(text, source_language_code, target_language_code)

if __name__=="__main__":
    main()
其中赋值为:
text = json_input[‘Input’][0][‘Text’] source_language_code = json_input[‘Input’][0][‘SourceLanguageCode’] target_language_code = json_input[‘Input’][0][‘TargetLanguageCode’]
运行结果:
I am learning to code in AWS en zh Process exited with code: 0
json.load() & json.dump() 正如前面所说,json.load() & json.dump()操作的对象是文件,我们实验前先建立一个json文件
{
    "Input":[
        {
        "Text":"Amazon RDS is a web service that makes it easier to set up, operate, and scale a relational database in the AWS Cloud. ",
        "SourceLanguageCode":"en",
        "TargetLanguageCode":"zh"
        }
    ]
}
结合Boto3,我们使用以下代码:
# Standard Imports
import argparse
import json

# 3rd Party Imports
import boto3

# Arguments
parser = argparse.ArgumentParser(description="Provides translation  between one source language and another of the same set of languages.")
parser.add_argument(
    '--file',
    dest='filename',
    help="The path to the input file. The file should be valid json",
    required=True)

args = parser.parse_args()

# Functions
def open_input():
    with open(args.filename) as file_object:
        contents = json.load(file_object)
        return contents['Input'][0]

def translate_text(**kwargs):
    client = boto3.client('translate')
    response = client.translate_text(**kwargs)
    print(response)

# Main Function - use to call other functions
def main():
    kwargs = open_input()
    translate_text(**kwargs)

if __name__ == "__main__":
    main()
首先,我们定义了import。内置软件包一起分组,然后是已安装的。 接下来,为了提供命令行输入,我们定义了一个参数.argparse–file 然后,我们定义三个函数。
- 第一个函数使用open()打开文件,并使其成为名为的python对象。然后,我们使用json.load()以获取所需的信息,然后返回该值
- 第二个函数是我们的标准Amazon Translate函数,它接受任意数量的关键字参数。
- 第三个函数是我们的主要函数。此函数用于按指定顺序调用其他函数。这将使用变量kwargs调用函数,该函数从函数返回值。然后调用translate_text()函数,并使用kwargs变量提供参数作为translate_text()函数的输入。
运行结果:
zyi:~/environment/python-01 $ python lab_5_step_5_json_input.py –file translate_input.json {‘TranslatedText’: ‘Amazon RDS 是一项 Web 服务,可让您更轻松地在 AWS 云中设置、操作和扩展关系数据库。 ‘, ‘SourceLanguageCode’: ’en’, ‘TargetLanguageCode’: ‘zh’, ‘ResponseMetadata’: {‘RequestId’: ‘9f8c7d8a-24c7-4095-b48c-5ec5ac468efc’, ‘HTTPStatusCode’: 200, ‘HTTPHeaders’: {‘x-amzn-requestid’: ‘9f8c7d8a-24c7-4095-b48c-5ec5ac468efc’, ‘cache-control’: ’no-cache’, ‘content-type’: ‘application/x-amz-json-1.1’, ‘content-length’: ‘185’, ‘date’: ‘Mon, 01 Nov 2021 08:57:16 GMT’}, ‘RetryAttempts’: 0}}